
Preventative Maintenance – Things to Check before You Trail Ride
Getting stuck before you hit your first rock isn’t how a weekend trail ride should go. Here are some items you should check before your next outing.
It never fails, one of your friends must fix something just before you even hit your first boulder. Maybe it’s you? By simply doing just a bit of preventative maintenance before you trial ride will help prevent this exact situation from happening to you. Fortunately, it’s also not hard to do.
The shortest amount of time you should give yourself to do this is with a day or two between this time and when you’re about to go out. This should give you time if you need to buy replacement parts and install them or schedule a time for a shop – like Vicious Off-Road – to do it. However, the week before is more ideal as this will give you maximum time should the part or parts you need have to be shipped out to you or your shop is too busy to take you in immediately.
The Walk-Around

The first thing is just to walk around your vehicle. Look at and feel the panels, flares, tire carrier, and tires can tell you a lot. Feeling the tires can help you determine if you’re experiencing odd wear that can come from the wrong inflation pressures or an alignment issue. Tugging and pushing on body panels and flares could reveal parts that are about come off. This gives you the time to tighten them up or secure them with new hardware – or at least ziptie them up.
This is also the right time to use this walk around to see if your lights are working properly. Turn them on and look for any that aren’t functioning. Turn on your blinkers for left and right signaling as well as using the emergency flasher to make sure it works properly. Have a friend or family member step on the brake pedal to see if they are operating properly.
Initial Test Drive

Prior to lifting your vehicle up or doing anything after the walk-around is taking it for a quick test drive. Feel for vibrations, listen for unusual noises, and detect any odd smells. Find a small dirt path and work the transfer case. These will be some clues to what you need to inspect first. Otherwise, you can follow our guide from here.
Checking Your Winch and Recovery Gear

Now is the time to make sure your winch isn’t about to burn out or fail on you. Rather it happens now than when you need it – like while you’re stuck on a feature. This will also allow you to go through your recovery gear and make sure everything is in good condition. You’ll need to put your gloves on, anyhow.
Initially, unwind it using the winch motor rather than disengaging the clutch for free spooling. This will allow you to feel the winch brake work as you’re pulling the line out to make sure it isn’t malfunctioning. Once you get a few feet out and the braking system feels good, stop using the winch motor and disengage the clutch to allow it to free spool. Unwind it out until the final five turns on the drum are exposed then re-engage the clutch.

Go down the entire line and inspect your steel line or synthetic rope. Look for frays, kinks or heavy rust in the steel line, and other damage that could cause it to break or weaken. Check your winch hook, make sure the retaining pin that attaches it to your rope or line isn’t about to fall out. If it has a one, does its clasp move freely?
If everything looks good, winch the line back in, keeping proper tension on the line and allowing the line to wrap evenly. Stop every so often and start the vehicle to allow the battery to recover from the drain of the winch motor. This will also prevent the winch motor from overheating, but you shouldn’t be reaching those types of temperatures since you’re not under a heavy load. If you are experiencing hotter temperatures than you expect, it may be time to inspect the motor brushes, contactor, and wiring.

Once the winch is fully spooled in, check your D-rings – if they are mounted to the vehicle or bumper – and their mounts. If they are bolt-on mounts, ensure they are tight, and that the bolts don’t show any damage. If welded, inspect the mounts for cracks at those welds. Check your D-rings to make sure their retaining pins remove easily and aren’t bent or damaged in any way that would cause them to break or not allow proper use.
Recovery Gear

Check your recovery gear before you stow it away in your vehicle. Make sure your snatch block is free of any damage and its pulley rotates freely. Check your winch line damper to make sure it doesn’t have any rips or tears that will prevent it from stopping the line from whipping if it breaks. The recovery strap and tree trunk protector both should also be free of rips or tears.

If you have a choker chain, make sure its free of damage. If you have one, your anchor should be free of major damage that could cause it to fail when in use. It should also fold away easily for stowage, if its designed to do it. Finally, check out your off-road or farm jack. It should be free of damage and excessive wear, work freely and not be missing any parts. You’ll also want to clean and lubricate the hinged parts with the proper grease or oil its manufacturer calls for.

Once that is done, try jacking it without a load to make sure it isn’t binding. Then, try lifting the vehicle with the jack. If it binds while loaded, use a pump jack or another, working farm jack to lift the vehicle up. Then remove the binding jack and lower the vehicle back down. Re-inspect, re-clean, and re-lubricate the jack, but be sure to re-inspect the climbing pins closely. If they are rusted, have large bits of dirt, or are overly worn out; exhibiting any of these can cause binding.
Inspecting the Suspension

When it comes to checking your suspension, we’re not talking about seeing how far your can articulate it. Instead, lift the vehicle up, secure it with jack stands, and inspect all the points where the suspension attaches to the axles and chassis. Look at the joints and make sure they aren’t worn out, loose, or have fasteners that are about to fall out.
If the joints can be greased, it won’t hurt to pack them with fresh grease but make sure any boots or seals aren’t torn prior to that. If they are, remove and clean the joints and degrease them, replace those seals or boots with new parts, and pack in fresh grease. Use a medium-duty liquid thread locker on the threads and torque them down or torque down or use new cotter pins if they are kept secure that way.

For those fasteners without cotter pins, mark the parts with small stripe of fresh paint. This isn’t for an “OEM” or “racecar” look but instead act as a visual aid to see if fasteners are loosening up. If you catch it in time, you usually just need to retorque them. However, if the stripe on the fastener is clocked more than an eighth of a rotation away from the stripe on the chassis or joint, you will need to see why they are loosening and inspect if the bolt. This could indicate that the bolt has yielded due to stretching or other damage.

Check your springs for any damage or severe rusting. Springs sag naturally, but if your chassis is too low, it may be time to replace them. Check your shocks (or struts on certain vehicles) for any leakage at the shock shaft. This indicates that the oil seal has failed and your shocks are no longer damping the movements of the suspension.
Steering
You’ll perform the same type of inspection and maintenance of your steering linkages.
Drag Link and TTB

For straight-axle Jeeps and twin-traction beam Fords, you’ll want to inspect the pitman arm, drag link, and tie-rod and all their joints for wear and loosening. Pack in fresh grease in these joints, but only if their seals or boots are not torn. Twin-traction beam suspensions will also have an additional tie-rod from the drag link to the left-side wheel, but it gets inspected in the same manner.

Some systems, specifically OEM parts, will use sleeves that crush down on the tie-rod ends to prevent them from loosening up. You’ll need to inspect them for wear, excessive damage, and unusual bending. Make sure the sleeves are tight and their bolts aren’t loose or missing.
Swing Set Style

For swing set steering systems, like those found on independent front suspension (IFS) Chevrolet, Dodge, and many import trucks and SUVs, you want to check that the idler arm is tight and undamaged along with the drag link, pitman arm and tie-rods. These systems will also typically have sleeves between the inner and outer tie-rods. Make sure these sleeves are tight, bolts aren’t loose or missing, and don’t show signs of excessive damage or wear.
Rack-and-Pinion Steering

Modern vehicles typically use a steering rack instead of drag links or swing set steering systems. Here, you’ll move one of your front tires by hand while keeping the other still. This will allow you to see if the inner tie-rod is worn out and allowing movement. You’ll also want to be sure to see if the entire rack is moving, as it can look a lot like the inner tie-rod is worn. This is caused by worn – or missing – bushings for the rack.

Also, be sure the tie-rods aren’t abnormally bent. Some do have bends and angles designed into them, but if you see where something made impact and a bend, that’s an inner that needs replacing. As the picture above shows, the 03-15 Nissan Titan's outer tie rods have a bend in them from factory to clear parts during its full range of travel.
Check the inner tie-rod boots for tears. If you find they are torn, replace them as excessive dirt and debris can cause failure from too much wear. If the outer tie-rods move but the inners don’t, the outer tie-rods are worn and need replacing. If they have torn boots that can be replaced, then remove the boots and clean the outer tie-rods. Then replace the boots and re-grease them.
Ball Joints and Front Wheel Bearings

Another critical check for steering related parts are your ball joints. The way to check this is to lift the vehicle in the air and support it to unload the joints. How this is done depends on where the spring puts pressure on the suspension. If the spring loads the upper arm or is a strut-type suspension (including MacPherson Struts), you’ll lift on and support the chassis with a jack stand. If the spring loads on the lower control arm (this is including torsion bars), you’ll lift by the lower control arm and support it there.

To inspect, follow this typical inspection procedure. You’ll then use a long pry bar, place its fulcrum on the ground, and lift the bar as it rests on the bottom of the tire. For anything under a 17-inch wheel you’re looking for at or less than 1/4-inch of movement and yes this is for wheel size, not the tire’s outer diameter. A 17- or 18-inch wheel will see 3/8-inch or less of movement. Any wheel larger than 18-inches is going to see 1/2-inch or less. Any more for those sizes and movements listed and you’ll need to replace your ball joints. You will want to check your factory service manual as there may be a specific procedure and measurements they require for pass or fail.
Wheel Bearings
For your wheel bearings, you’ll keep the vehicle lifted in the air just like you have it for your ball joint inspection. You’ll then grab the top and bottom of the wheel and push on each. If you feel more than 1/8-inch of movement, your wheel bearings are too loose. You’ll want to inspect them for loss of grease, excessive wear, and missing locking devices like cotter pins or fasteners. You’ll also want to free turn the wheels to feel if the bearings have any grittiness or “crunchiness” as this typically indicates a failure of the bearing and you may need to replace them.
Brakes

If you’ve pulled your wheel off or still have the vehicle in the air, now isn’t a bad time to check your brakes. Look at the rotors to see if there is any cracking, scoring from overly worn pads or road debris, or discoloration from excessive heat. If you find any of that, you’ll want to have your rotors replaced. You’ll also want to replace your brake pads at the same time as the scoring or damage will have also damaged the pads, too.
Even if your rotors are fine, you’ll want to measure the amount of brake pad thickness you have. Anything under 1/16-inch (sometimes referred to as 2/32-inch) must be replaced, no exceptions. This is measured from the backing plate of bonded pads and from the head of the rivet on riveted pads. It’s not a bad practice to also turn your rotors at the same time you replace your pads, but if you’re going back to the exact same pad it isn’t a requirement. Though, it is still considered good practice to resurface the rotors.
Why Turn the Rotors?

If you’re switching to a new pad compound or even manufacturer, you’ll want to do this for proper braking performance. Sometimes, the pad material that gets bedded into the rotors will not always be compatible between compounds and manufacturers. This can cause poor braking performance with extended braking distances, increased fade under braking, juddering under braking, and other issues. So, if you get new pads, turn or replace the rotors.
Drum Brakes

For drums, much of that advice on disc brakes above still applies to drums. However, you’ll add in the need for adjusting the brake shoes to the drum for proper drag. While much of this goes by feel and experience, the wheel should rotate freely but come to a steady stop after a half or single hand rotation. Some drag will be caused by the drivetrain but if your tires rotate at the same rate for longer than a single rotation, you need to adjust the drum shoes. Keep in mind, too much drag will increase wear on your brakes and potentially reduce fuel mileage.
Hydraulic Parts
You’ll want to inspect your lines for dry rot on rubber hoses, kinks in metal ones, and leaks at fittings. If you see any of those, you may need to replace the offending part. You may be able to solve a leak from a loose fitting by tightening it. However, if you feel any resistance while you tighten it, forget it, replace the line.
On your drum brakes, you’ll look at your wheel cylinder while you have the drum off. Inspect it for leaks, if it moves freely as you squeeze the shoes in, and missing or damaged parts like the boots. You’ll also look to make sure the parking-brake (if dealing with a rear drum axle) mechanism and return springs are in their places without binding or interfering with other parts.
Power Brake Booster

For your brake power booster, some parts of inspection will depend on the power system you have, if you have one at all. For power assisted systems, you’ll rest your foot on the brake pedal and keep it there at the same pressure for at least 10-seconds with the engine running. If it moves and you haven’t added any pressure at your foot, you have a leak in the power assist system. For non-assisted brake systems, you’ll skip to “Master Cylinder.”
Hydra-Booster

With hydraulic booster systems, you’ll then turn the engine off and press on the brake pedal several times to remove any residual assist pressure. Then, you’ll press on the brake again with a light force, no more than about 30-pounds of force from your foot and restart the engine. The pedal should move up slightly as assist pressure builds up as the engine runs.
If this doesn’t happen, you have an issue with your hydra-booster. You’ll want to inspect it for leaks along with the lines between the assist and the pump. The pump may be the same pump as your power steering system, a separate but engine-driven pump, or an electrical pump located off the engine.
Vacuum Booster

For vacuum booster systems, you’ll start by pressing the brake pedal several times with the engine off. Then, press on the brake pedal with about 25-pounds of forces and keep that pressure on the pedal. Start the engine and feel if the brake pedal moves down (not up like the hydraulic booster).
If it doesn’t move or, worse, moves up, there is something wrong with the vacuum booster. You’ll also want to make sure your booster doesn’t show any damage, vacuum leaks, bad hoses, or anything that would prevent the booster from working properly. If the pedal moved up, this is a sign that pressure is reaching the inside of the vacuum booster. You will want to check the one-way valve connected to the booster vacuum line.
Master Cylinder

Inspecting the master cylinder of your brake system is also important. You’ll want to make sure the fluid level is correct, there aren’t any leaks in the lines coming out of it, and that all four wheels receive pressure from the cylinder. That last part would require a short test drive but could be done by having someone turn each wheel as you press the brake to make sure it stops. Even if you do that, you’ll still want to do a slow test drive to ensure the brake system is working properly.
Transmission and Transfer Case

You won’t be doing any trails if you don’t have fluid in your gearbox or transfer case. Well, you could, but you probably won’t go far down the road before one of them fails.
Automatic Transmissions
![]()
If you’re one of the fortunate souls to still have an automatic with a dipstick, you’ll want to have the engine on and running. Then, pull your dipstick – which will typically be a yellow pull if it doesn’t say “TRANSMISSION” on it outright – and clean it with a rag. Push it back in until it stops and pull it out again and see where the fluid touches on the dip stick. The highest evidence of concentrated transmission fluid should be at a line or between a pair of them, at hole cut out, or between a set of hash marks.

If it is below this mark, you’ll want to add fluid but before you do, rub some on your fingers. Check for black or silver discoloration as these will show that the transmission fluid is needing to be replaced or that the clutch linings have begun to wear out. Some slight discoloration is normal, but it shouldn’t be obviously so. Most automatic transmission fluids are red in color and will be slightly transparent with a red tint when you wipe it with a clean rag or on your fingers. Burnt or fluid due for a change will also have a very distinct smell. It will be similar to the new fluid but also a tinge of metallic or burned aroma.

If the fluid is good by its color but low, you want to fill it to the right level. While the engine is still running, you’ll add a small amount of transmission fluid at a time until it at its marks. As the fluid moves through the transmission, it requires a certain amount of fluid to keep its proper pressures and you can only detect that as the transmission is working and pumping fluid.
![]()
If you add fluid when the engine is off and the transmission isn’t pumping fluid, you could overfill or underfill it. Do not overfill your automatic transmission or you will cause it to not function properly. It is just as bad as underfilling as the pressures could be enough to damage seals, solenoids, springs and other parts like the torque converter, transmission fluid pump, and valvebody.
If you’re the unfortunate soul to have a transmission that doesn’t feature a dipstick, you may still be able to check the level if it can be read by the OBD system. You’ll need to reference your factory service manual or a vehicle specific online forum or Facebook page you trust to see if that’s possible. Problem is that you’ll also most likely need a special tool or machine to add fluid to these types of transmissions. You’ll typically see them come with “long-life,” “World Standard,” or “Lifetime Fluid” from the factory.
Signs of a Bad Transmission

A word of caution, if you are finding excessive metal shavings – to the point that the fluid is almost grey in color rather than red or you can pull metal from the fluid with a magnet – this is a sign that your transmission is severely worn. Removing the fluid and replacing the filter could result in slippage with fluid in this condition. What will occur is that the bands and clutches will no longer have any type of friction.
This is because the bad fluid with the excess metal shavings were giving it this missing grip. If you remove this fluid, the friction from the shavings will also be removed, and the transmission will begin to slip or slip worse than it had before. Potentially to the point to where the vehicle will not move after your fluid and filter change. If you see this, it’s time to schedule a further inspection and possible rebuilt with your trusted transmission rebuilder.
Manual Transmission

The manual transmission is a bit simpler, thankfully, even with modern designs. You’ll typically see two plugs on one side of the transmission. One is a fill while the other is for fluid level and inspection and the fill is always found higher than the indicator. Because it has no pumps to drive fluid, the engine isn’t required to run for this.
Manual transmission fluid will be one of two types: gear oil or ATF. Different manufacturers will require different fluid types, even if the same transmission is used between two different manufacturers. Unless there is a Technical Service Bulletin (TSB) or an official update from the OEM, use the fluid they require or the exact aftermarket equivalent and nothing else.
Because of that, manual transmission fluids will be the transparent gold color like you are used to for engine oil or transparent red color like we discussed with automatics. Similarly, though, you’ll still look for discoloration, odd smells, and metal fragments that tent the oil a silver or grey color. To check the level, you’ll remove that lower plug that’s used for fill indication and stick your finger into it to get some of the oil on it.

If you need to fill, you’ll remove the top plug and fill fluid in until some beings to slightly pour over the indicator hole’s lower opening. It might be slightly difficult to fill the manual transmission due to placement of the fill hole and body or chassis. A small fluid transfer pump that you can set inside the bottle might be needed if you can’t tip the bottle to fill the fluid due to this placement.
Again, much like the automatic, you don’t want to overfill the transmission with its gear oil or fluid. However, it isn’t as critical as it is with an automatic. It’s also potentially harder to do if you’re filling it properly by filling from the top hole and leaving the lower inspection hole open. The excess fluid will drain out before it can get higher than that.
Transfer Case
![]()
Hop inside your vehicle and see that the transfer case shifts into 4WD and 4LO. If you have a push-button version, work it as you would normally and making sure it shifts as well. If it won’t engage or won’t engage easily, there may be something binding the shift linkage under the vehicle on a manually shifted case. On automatic cases, the shift motor may be bound from dirt and debris or may have failed.
![]()
Many transfer cases will be like the manual transmission in that there are two holes. However, you’ll find that the lower hole isn’t an inspection or fluid fill indicator but is just a drain. The upper hole, instead, is your fill and fill will be determined by the amount of fluid you use as recommended by the manufacturer. Most any New Process or New Venture transfer cases that many OEMs use will be drained and filled in this manner. Many Dana and older transfer cases also require a separate fill for the low-range unit.
Oil type will vary as widely as some use gear oil, some use ATF, and there are many older transfer cases that use straight-weight engine oil. If you’re unfamiliar with that term, straight-weight – also known as monograde oil by the Society of Automotive Engineers (SAE) – is oil that does not have a W viscosity, where oil is less viscous (thinner) at temperatures under typical engine operating temperature of 180- to 210-Farenheit.
However, these oils with a “winter” viscosity will keep that lower rating down to -40-Farenheit. All oils will increase viscosity (become thicker) as temperature drops. Consequently, this is also why those older transfer cases would recommend going to a lower viscosity oil during “winter” months and going back to a higher viscosity oil during “summer” months. Looking through sites and reports where many people still use older NP transfer cases, like the NP203, it seems that modern, multigrade engine oil works well in these transfer cases, too. However, we always recommend follow your manufacturer’s requirement on fluid type and fill amounts unless there is a TSB saying otherwise. Check for burned smells, odd colors, and metal debris in the oil.
Differentials

When looking at your differentials, you’ll want to inspect it for leaks and damage. Check the tubes to make sure they’re roughly straight. Make sure the differential cover (on those types of axles) isn’t damaged and potentially contacting the ring gear. Even on drop-out style differentials, you’ll want to make sure your axle housing isn’t making contact here as well.
Check to see if your axle seals are leaking along with where your differential cover or drop carrier seal to the differential. Any leaks in those places should be taken care of as soon as possible. Both C-clip and drop-outs will be filled similarly, with a single hole for filling. To drain, you remove the cover on C-clip differentials and remove the carrier on most drop-outs.

There are some drop-outs that will have separate fill and drain holes, especially in the aftermarket. These can range from both on the carrier to the drain being added to the housing or even both drain and fill on the housing where the fill is larger. This is also true of many aftermarket C-clip differentials, were a drain plug is added for cleaner, easier fluid draining.
The pinion seal should be checked for any leaks while you’re at that end of the differential. Check the flange for damage and your U-joints for any play. While you’re there, and if you can, grease them. This goes for both front and rear differentials. Some U-joints don’t have provisions for re-greasing but you should still inspect them.
Driveshafts

You’ll also want to inspect the driveshafts and make sure they aren’t damaged or bent in any odd ways. This can be felt, though, as you drive along and there is a constant vibration from the center of the vehicle at all speeds.
Locking Hubs
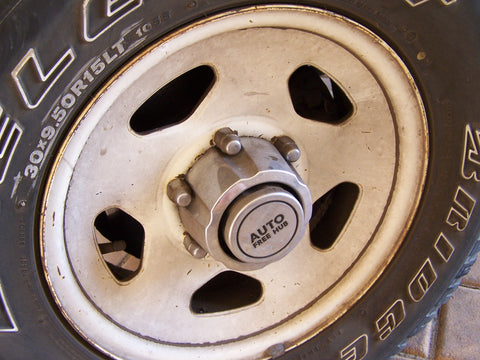
The front driveshaft will cause a vibration at the front of the vehicle without feeling it in the steering wheel like you would an out of balance or even a bent wheel. Depending on your front differential and if it locks the axles in 4WD, you may only feel this if the front axle is engaged during 4WD operation. If your axles are locked (selectable or not), they will cause the front driveshaft to spin.

If you have selectable hubs at the front, inspect them to make sure they are working properly. Manual versions should turn relatively easy while auto locking should engage when you shift into 4WD. If you can’t turn a manual version, it may be packed with mud or dirt, worn out, or need servicing. You’ll take it apart and inspect it. Auto locking hubs can also suffer the same issues, but also inspect vacuum lines that activate them.
Wheels and Tires

When it comes to your wheels and tires, you’re mostly looking for damage. Sidewalls with deep cuts, bent wheels, deep gashes in the tread, missing lug nuts, and other items like those. You’ll check the torque of your lug nuts to make sure none of them are coming loose on you. If you have beadlock wheels, you’ll check the bolts holding the beadlocker to the wheel and retorque them.

While you’re going to drop tire pressure on the trail, it’s good to make sure your tires are up to proper road pressure. This is usually between 32- and 45-PSI, depending on what your vehicles manufacturer or tire manufacturer recommend. If you have on-board air, now is the time to inspect it to make sure it’s working. If you don’t, make sure your air tank is holding air, isn’t dented, or showing fatigue or cracks in its welds. These can all be clues to an eventual air tank failure. If you don’t have an air tank, get one from a reputable dealer and brand.
Underhood

We’ve been kind of working from under the vehicle to above it, though, we have been under the hood already to check the fluid level of the automatic transmission. There’s still more under here, so let’s start with checking the engine oil level. Even if you are using a full synthetic oil that has change intervals of 6 months or more, you should still check the level.

All oil gets used up and burned by the engine and this can still lead to low oil levels. So, yes, every time you fill your gas tank check your oil level like you did with non- and semi-synthetic oils. Further, unless your oil filter is also made for these long intervals, it’s recommended to change it every three or four months. You’ll also top off the oil after that change as you’ll lose what’s in the filter. If you’re at that time frame, think about changing that filter.
Just like the transmission dip stick, there will be hash, dots, or lines that show its level in the oil pan. If its low, add about quarter to half a quart at a time until the oil is at its proper level. Some power steering reservoir caps have a level indicator just like a dipstick while others have a sight glass made into the reservoir. Again, if its low, add a little at a time until its at the proper level.

Check your cooling system and inspect the radiator for leaks. Look for seeping around the tanks, leaks from the core, and damage to the entire assembly. Check your hoses for leaks, including the smaller line leading to the overflow tank, if your cooling system is an open style. Closed systems will have an expansion tank that’s under pressure and the radiator will not have a cap. Inspect that expansion tank for leaks and cracks, too.

A final and quick check will be checking the air filter. If you open the air box and find that the filter is covered in dirt or has tears in it, replace the filter. If you have an aftermarket filter that can be cleaned, won’t hurt to do that. If it needs oil, be sure to oil it after cleaning. Also, check the intake tube and clamps for looseness and leaks. If you can tighten the clamps, do so, but if they are at the limits of clamping, then the tube may be damaged under the hose.
Test Drive

A final part of your inspection should be a short test drive. Take your vehicle down the road and feel it out. Has anything improved or have the vibrations, smells, and noises remained? Does it still drive straight? Does the transfer case shift on that same dirt road you were driving on? If everything is normal, you’re ready for that trip. Otherwise, get back under the vehicle and re-inspect the areas you’re noticing issues with on this drive. If you’re unable to figure out the issue, it’s time to take it to a professional shop like Vicious Off-Road.
That’s Not the End

While you’re now ready to get on the road and hit the trail, that’s not the only time you should do this thorough inspection. After you get back from your trip and to home, you should also do a follow-up inspection. It doesn’t necessarily need to be as exhaustive as the pre-trip inspection, but there are things you’ll want to pay attention to once you’re back. We’ll detail those in another article.

The one thing you should do, however, is consider your comfort and skill level before you perform this inspection. If you aren’t or don’t have much experience, you’re going to want to take your vehicle to a qualified shop. Fortunately, if you’re in or around Ontario, California, Vicious Off-Road is your stop for vehicle maintenance, repair, and customization in the world of off-roading. Call and schedule an appointment today to get your vehicle checked out before your next trail trip.
Otherwise, your vehicle might check-out before you even climb your first boulder.